How to shoot in Manual Mode in just 8 minutes

How to shoot in Manual mode, everything explained simply in just 8 minutes.
Today I am going to help you to shoot in Manual mode. Now I should also say you don’t always have to shoot in full manual mode but it is very important to know why you shouldn’t be shooting in Auto mode.
Shooting in Auto mode is like throwing a bucket of paint at a canvas, yes it’s technically painting but shooting in manual or semi manual is like using a paint brush to delicately sculpt and design your image with each individual brush stroke. Remember photography is all about painting with light.
So come on, let’s go make you a better photographer in just 8 minutes by watching my video below or if you prefer then just keep on reading…
Why AUTO is killing your photography.
For me when I go to take a photograph I have this incredibly distinct vision of what I want to capture already in my head, the hard part for most people is translating that vision to the camera.
If you really think about it there is no way your camera can know what you are looking at or what you are looking to show the viewer, so how can your camera possibly get it right in Auto mode? Well, it just can’t, as it needs more creative input from you.
Now, as I mentioned above you don’t always need to shoot in full manual mode but you really do need to stop shooting in Auto mode.
You can use half manual modes by shooting in either Aperture priority or Shutter Priority, I know that might sound a bit complicated! It’s not really though, so don’t worry, it’s all fairly straight forward.
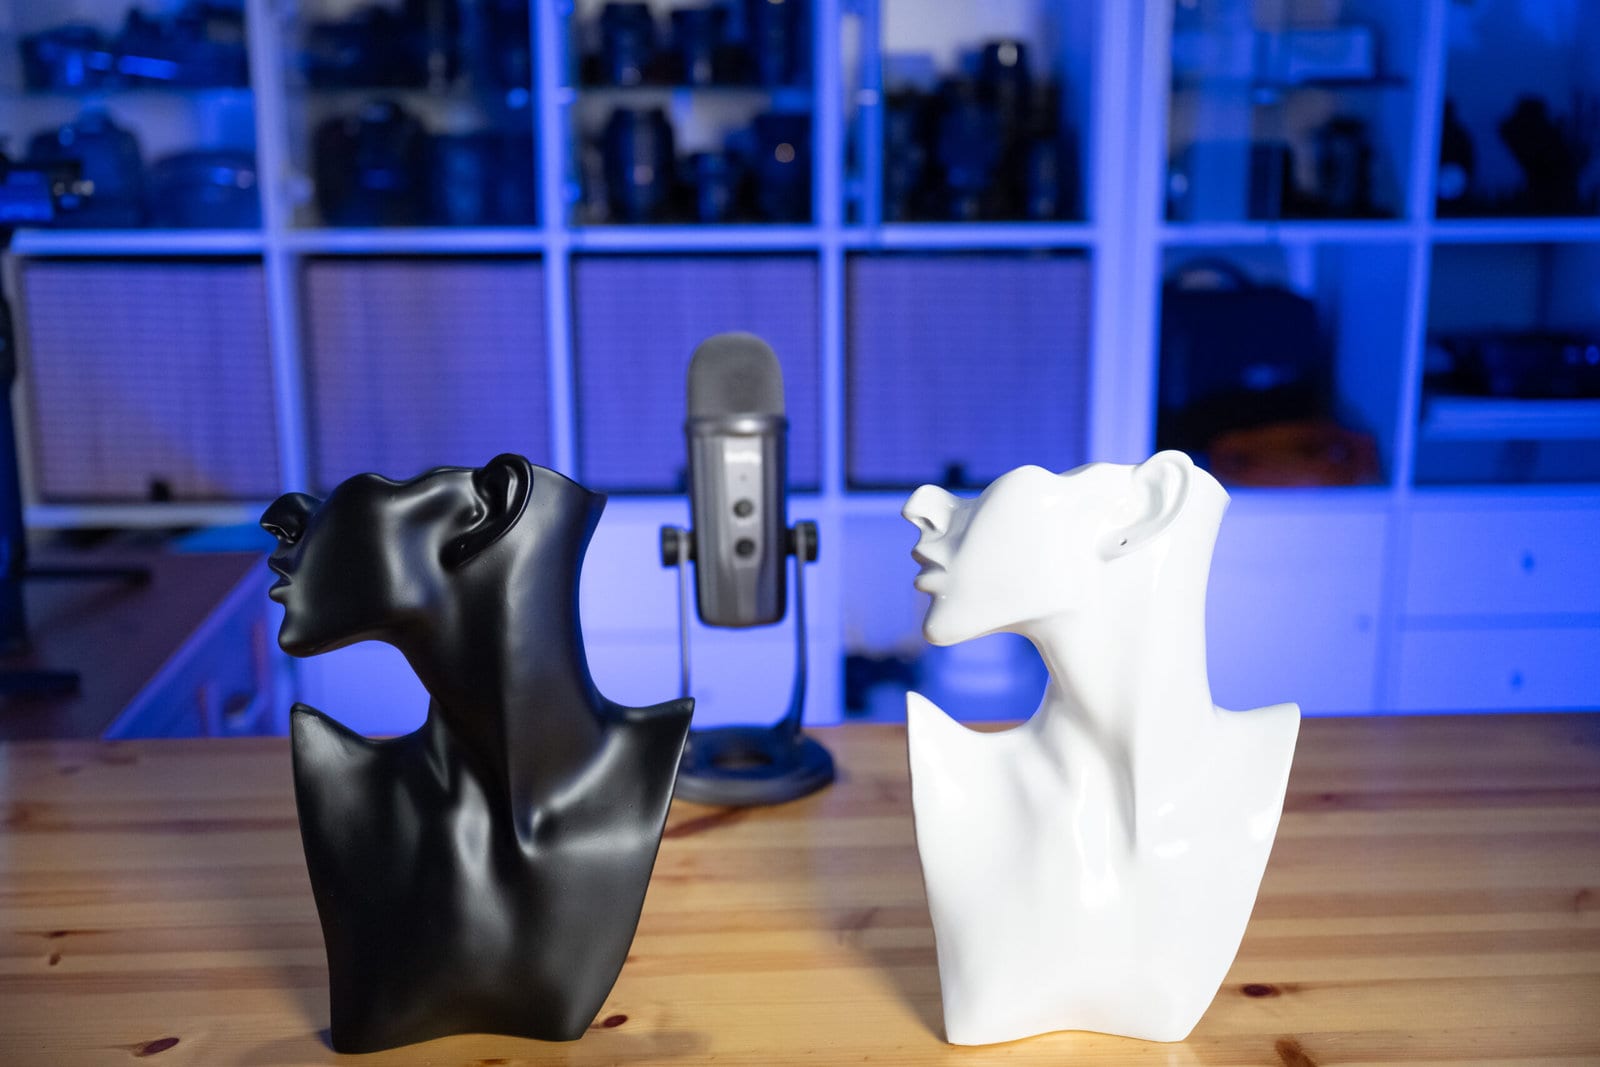
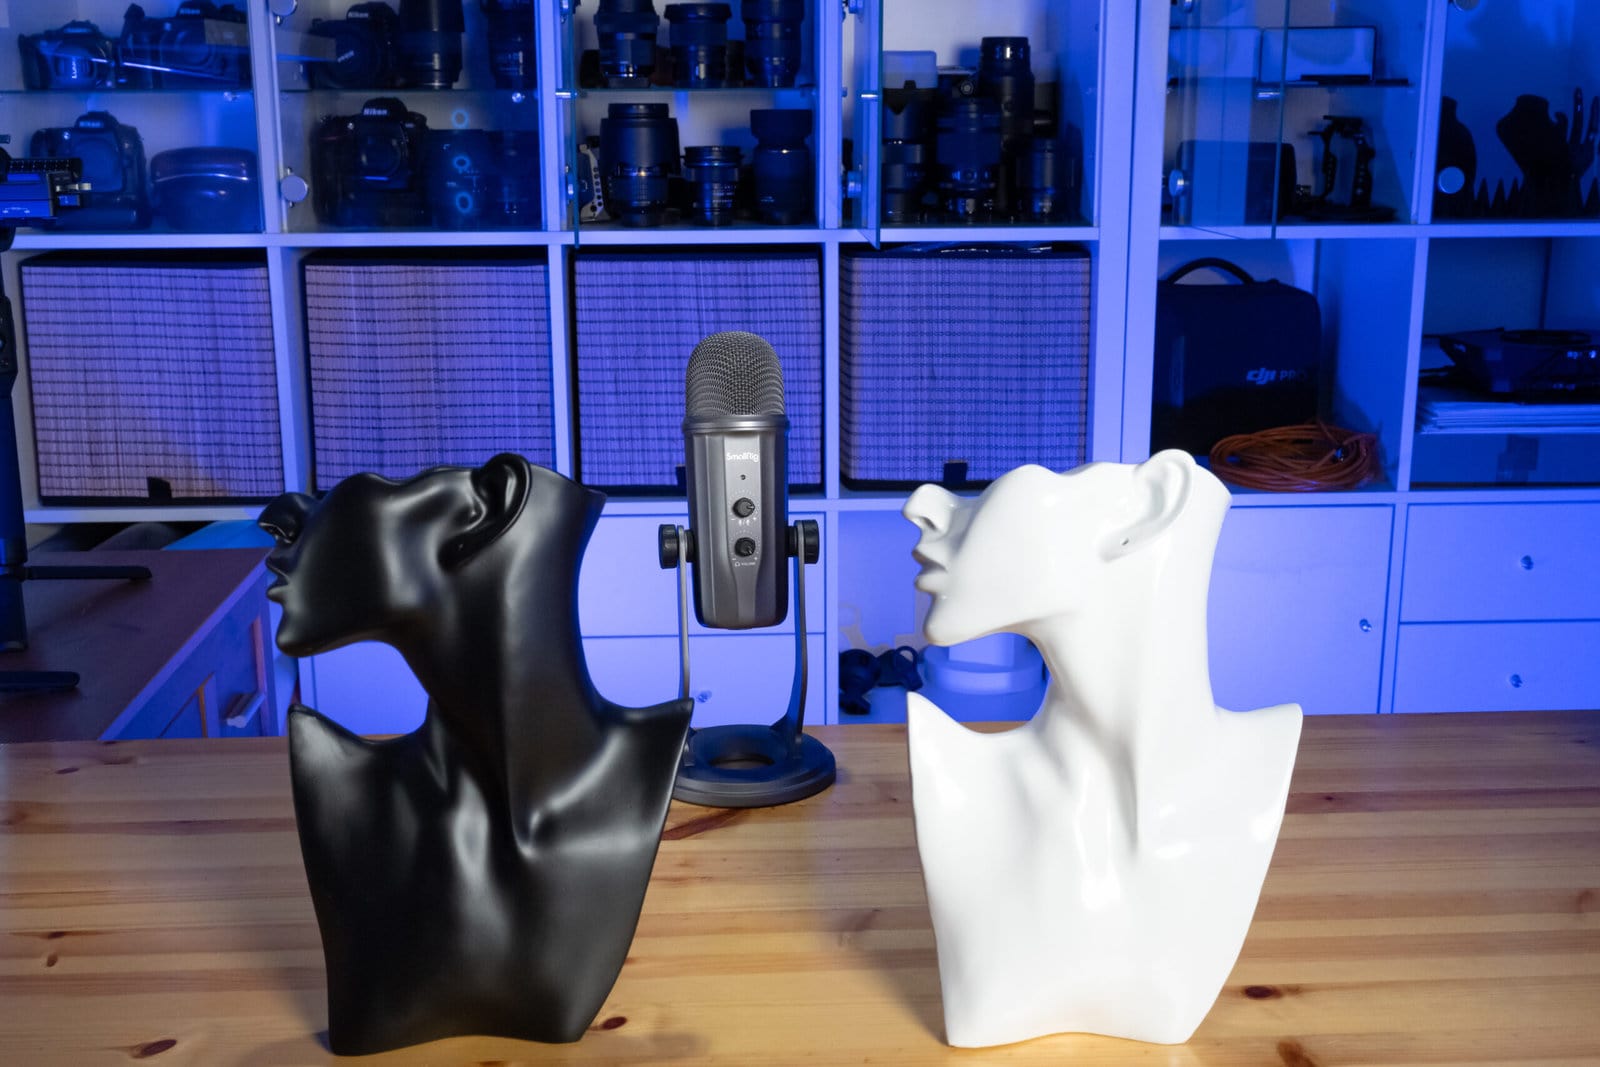
To help show you what I mean look at the two photographs below, these photographs were taken only seconds apart in the same lighting, notice how the background has melted away in the first shot.

The above photograph was shot with a shallow depth of field, this simply means that most of the image is out of focus. This effect really helps to isolate the subject from the background and can be used for amazing creative effect in your photography.
The photograph below then is a polar oposite as it has a larger depth of field so more of the image is in focus, this shows you everything in the image in detail which is great but it can also be very overwhelming as you just don’t know what to look at first.
In the next section I will explain exactly how you can very simply capture images like these and tailor your photography to exactly what you want people to see.

Shooting in Manual mode explained.
A photograph has two basic parameters, yes I am keeping it very simple for now.
Aperture
The first is your Aperture also called your F stop, the aperture is the story teller of your scene. It’s your creative tool to show or guide your viewer to what you want them to see, hence it should be one of the first things you adjust.
Aperture or your f stop controls how much of the picture will be in focus or to give it it’s proper description… it controls your depth of field.
Your Aperture is measured in F stops like F2.8, F8 or F11 for instance, a very handy trick here is to think of the F as standing for focus so the larger the F number the more focus you will have in your photograph.
A side point to remember here is it also controls how much light goes through your lens and into your camera but lets forget about that for now. I will come back to that later on.
Shutterspeed
The second part is our shutterspeed. This is very simple again as it’s just how long the light shines on the sensor.
A fast shutterspeed means you capture the image very quickly so you will freeze any movement in the image.
A slower shutterspeed will create motion blur if there is any movement in your scene of course.
So your shutterspeed is also very important depending on the type of photography you want to capture. Remember the “speed” in shutterspeed is the clue here, so the faster the scene the faster your shutterspeed needs to be.
My step by step instructions on how to shoot in Manual mode.
So we stick to our plan and set our aperture first, when we have decided how much of the image is to be in focus or what depth of field we want we can then adjust our shutterspeed so the image is exposed correctly.
How do you know the photograph is exposed correctly? Well, a dark photograph means your shutterspeed was too fast so the camera is just not seeing enough light to make you photograph.
A bright or white photograph means there is too much light coming in, so you need to make your shutterspeed faster.
This means the sensor won’t see the light for as long so it won’t be as bright.
So for me a lot of the time I am using my shutterspeed to balance out my exposure.
Now shutterspeed can be used for creative effect also with long exposure photography or high speed shuttershots to freeze movement in sports or wildlife for example.
Finally we come to the last or the third element of the exposure Triangle and this is your ISO.
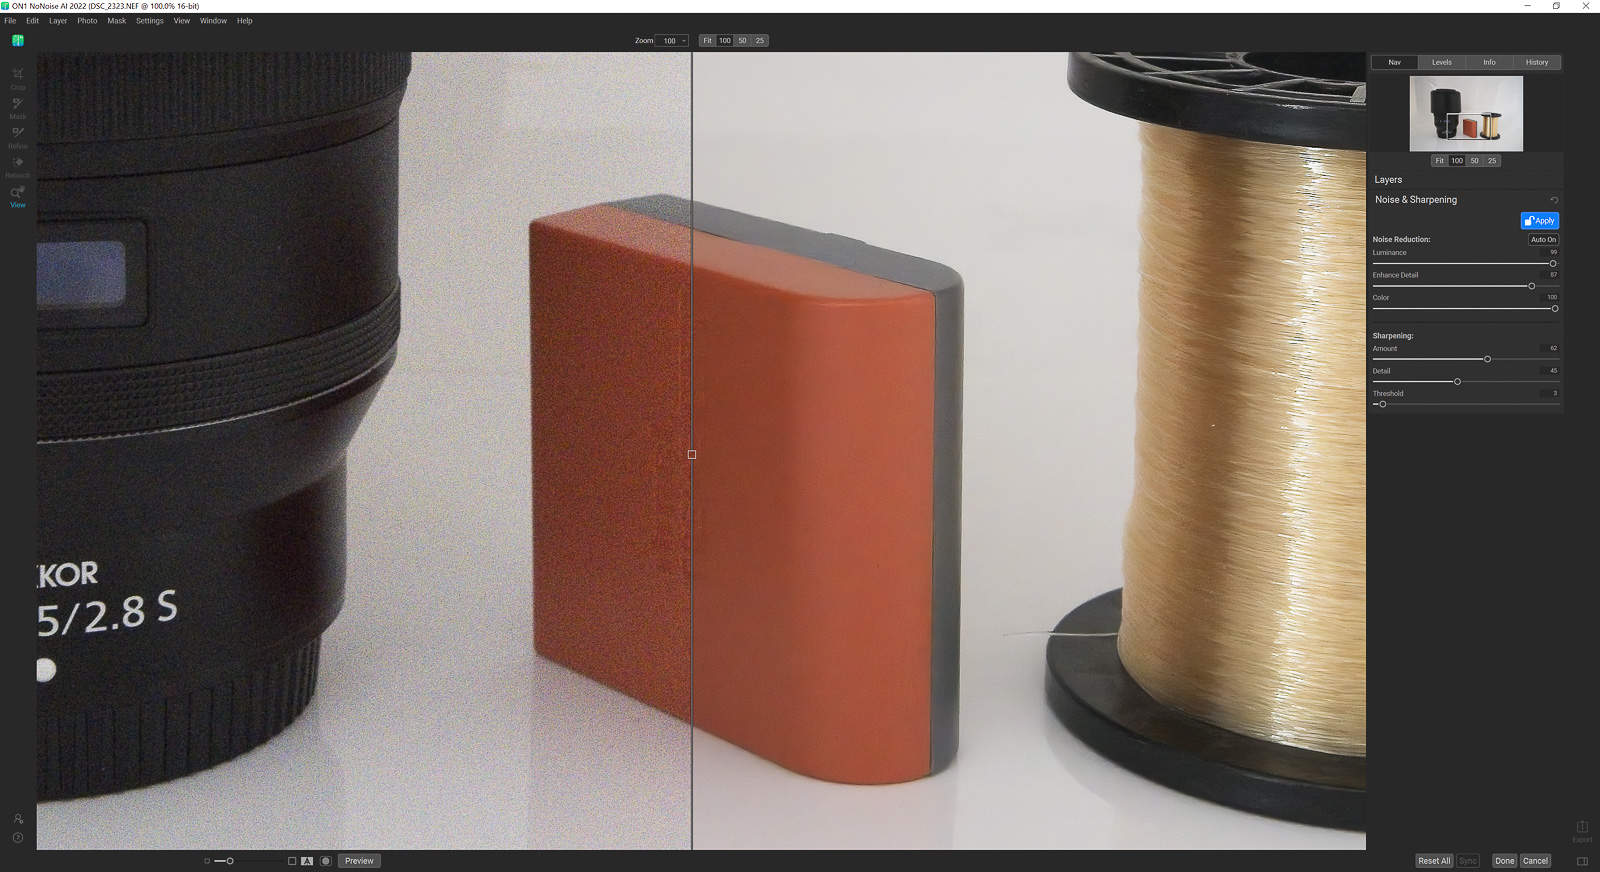
ISO is basically a light amplifier that is built into your camera to amplify the light signal coming off the sensor, now with any amplifier when you start to increase the amplification you will create noise.
In the image below you can see on the noise on the left of the image and on the right you can see how clean and clear the image is. The noise in this example has been cleared up in noise reduction software. On1 NoNoise AI 2023 was used in this example.

So why use a Higher ISO then?
Because sometimes we simply have to, if you are shooting in lower light conditions with fast moving subjects then you may have no choice but to increase your ISO, I have another video on ISO coming up soon where I will concentrate a lot more on how to use it and also explain why you shouldn’t always leave it on it’s lowest setting.
What I recommend for now is for you to leave your ISO on it’s base ISO (google is your friend here), what the heck is Base ISO Kieran? Well it’s simply the least amplified and hence cleanest ISO setting your camera provides and only ever adjust it if you need too.
If your ISO is left on Auto while you are shooting in manual mode then it could be changing from shot to shot and your images for some unknown reason to you are getting brighter or darker without you even adjusting settings.
Having your camera set to auto ISO when you are first learning to use manul mode is one of the biggest issues most people have when starting out in manual mode.
I always tell clients if the first two settings which are your Aperture and Shutterspeed produce a photograph that’s still too dark then you probably will need to adjust your ISO, remember the Higher the ISO the more it amplifies the signal and the more noise it creates.
I have an article on What is ISO here if you want to learn more about ISO in photography and it’s effect on your image.
I also have both one to one and group photography workshops here if you are interested in learn more.
As well as a welth of articles on Long Exposure Photography, Seascape Photography and Jpeg vs Raw etc… on my photography tips and tricks page here, you can also see that page in the menu at the top of the page.
I hope this short video helped to explain the Exposure Triangle a bit better to you and you can confidently go out there now and start experimenting and shooting in manual mode.
You can also see my other work over on my second website Kieran hayes Photography if you want to have a look at it.
See you out there,
Kieran.
