What is ISO in Photography and how to shoot like a PRO
What is ISO and how to use it.
Hello and welcome to my Easy ISO explanation blog post and video, I will not only explain what is ISO in photography but also how you can use it going forward. With as few ISO tips thrown in also to help you capture some sharp photographs even in low light conditions.
More importantly to fully understand ISO and when and how to use it we need to look at how your camera physically see light first.
How your camera sees light.
To understand ISO we first need to look at light and how it hits your cameras sensor, then we can look at ISO and why it is needed.
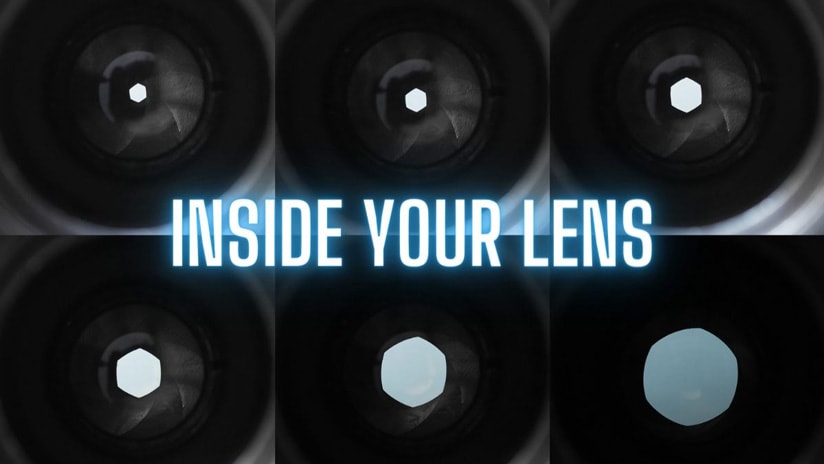
The first thing the light from your soon to be photograph meets is your is Aperture blades and in the photograph below you can see how they effect light.
To keep it simple… The smaller hole is as a result of you using a higher F stop to give you more depth in your photograph, now as you can imagine that reduces the light going into your camera by a lot. The following images in the sequence are all using slightly wider Apertures so they will let in more light but the wider you go the smaller the depth in your image will be.

How shutter speed affects the light in your camera.
Shutter speed and how it works is basically just two shields that move in front of your sensor. When you press the shutter button one shield drops down letting light hit your sensor and then depending on how long your shutter speed is the second one follows down and blocks anymore light from coming in and hitting the sensor. So, if you take a photograph at 1/125th of a second your sensor can soak in the light for yes you guessed it 1/125th of a second. Now, if you set your shutterspeed to 1/250th of a second, your sensor only gets to see that light for 1/250th of a second, so it gets to soak in half as much light as a result.
In the length of time you are taking the photograph your cameras sensor has to get enough light in to make your photograph, if enough light doesn’t come in then you will get a dark photograph. This is where we use ISO to amplify the light that hits the sensor to make a useable photograph….
ISO Explained Simply.
I can nearly guarantee you that if you continue reading for the next 5 minutes you will not only understand ISO but also know how to use it and more importantly howe far you should push it.
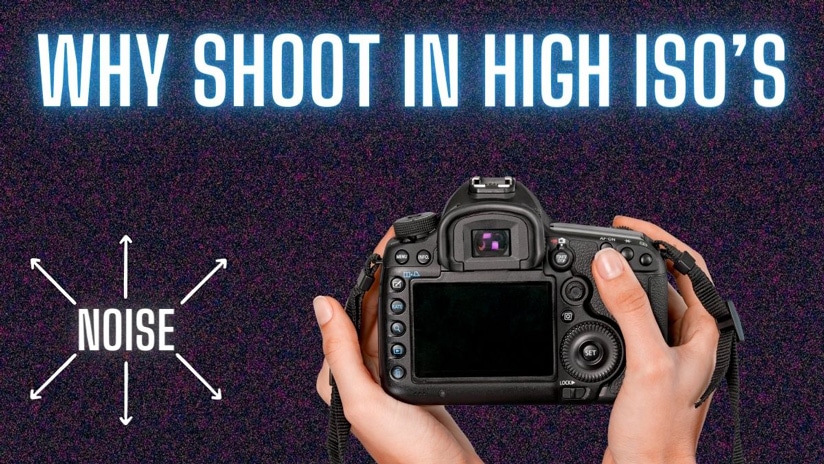
The simplest way to look at ISO is to think of it as an amplifier for the light coming into your camera, a bit like a guitar needs an amplifier, without the amplifier your guitar simply wouldn’t be loud enough right? Well your ISO setting is exactly the same, now the most important point to remember here is that the more you turn up the amplifier or increase your ISO’s number the more noise you will generate in your images.
As you are amplifing the light you are also amplifing the noise in your photograph. An important point to remember here is that the higher the ISO number you are using then the more light your camera will thinks it sees but also the more noise you will get.

Why Use high ISO’s?
So why increase your ISO at all? Why not just leave it on a low setting? Well, that’s what I do until I am forced to increase my ISO.
Let me give you this example of how you might use a higher ISO. Say you are at a wedding and the couple are having their first dance, you don’t want to use flash and the natural light or ambient light in the room isn’t great.
Now if your camera is on a low ISO and you take your shot…. It’s going to be super clean but the couple are going to be blurred. That’s because your shutter speed was too low. The reason your Shutter Speed was so low is because your camera needs to see the light longer to soak in enough light to make the photograph. While your camera was still taking the photograph the couple had moved position, so they came out blurred in the shot.
So how do you take a photograph in those conditions? Well, you need to use a faster shutter speed, so your camera can help to freeze the action. The only way you can do this is to use a higher ISO setting. Now, if you’re shutterspeed is fast enough it will take the photograph so quickly that the couple are frozen perfectly in the shot.
The only way to have a faster shutter speed is to open the aperture in your lens (lower F number) which lets in more light but if it’s already open wide then you need some way to amplify the light hitting that sensor and yes that’s where ISO comes in.
By increasing your ISO the camera can see more light so you can use a faster shutter speed. It’s always going to be better to have a slightly noisey image then to have a totally blurred photograph.

How do you know what ISO to use?
So, how do you know what ISO you should then? Well, as I always tell workshop clients the answer to that is very simple you just need to go and sit at your kitchen table (at night) and take several photographs of the same subject in the same light but at different ISO settings. Start at ISO 400 then go to 800 then 1,600 then 3,200 then 6,400.
Once you have taken those shots you need to upload them on your computer and make sure to edit them to your normal liking and then zoom in on them a bit. The reason to editing is key is because if you like to recover a lot of shadow detail in your editing style then the higher ISO ranges are going to really struggle there and create a lot more noise.
Every camera model behaves slightly differently in the higher ISO’s and we also all have different levels of acceptance for noise. For me personally, I nearly always have my ISO below ISO 1,600 but I am a real pixel peeper and my clients demand super clean images also.
Now 95% of my images are captured at ISO 64 so they are very clean as a result.
The point of trying the Different ISO settings is you now know how far you can push your ISO and still be reasonably happy with the results and make sure to write that number down. Let’s say it’s ISO 1,600 then the next time you are in that situation like that I would advise you to set your camera to ISO 1,600 and fire away.
It’s always a good idea to take a quick test shot before the couple start dancing, just to be safe.
The good news is today there are a lot of really good noise reduction editing aplications out there and they can work sheer miracles on noisy images but again please do remember they are not perfect and will never be as good as a lower ISO photograph.
I hope this helped you a bit and I will also be posting my Dual Native ISO video and blog post soon. Don’t forget to check out my “How to shoot in manual mode” video over on my YouTube channel.
If you want to turbo boost your photography skils then why not join me on one of my Photography workshops in Ireland, I have both group and one to one sessions available.
I have a really cool article on the TOP 5 accessories for your camera bag here and crazily they all cost ess than €30 in total to buy and there are some awesome tips in thee also.
Or check out my how to shoot in manual mode article here.
See you out there,
Kieran.

